How to See Temporary Files in Windows 10
In Windows there are special folders where temporary files are stored. If you need to access these files and aren't sure how, this guide will show you.
Before going into how to access temporary files, let's go over what they are and why you'd want to access them:
There are many different types of files that can make up temporary files. Examples include unsaved text files, files extracted from installers and compressed files, video files from streaming websites and downloaded executable files that you "run" instead of "save". In general they are files that are created by programs for a specific purpose and meant to be used for a limited amount of time or uses. Once that purpose has been fulfilled, Windows will eventually delete them.
Sometimes temporary files will stick around for longer than you want them to and take up hard drive space. That's why a common reason for accessing the temporary file folders is to delete the files manually. If you don't want to delete these files manually there are both system and third party tools that help you do so automatically. The tools will be covered in this guide.
You may also want to access temporary files in order to restore data that would otherwise be lost. Expanding on the first example, if a word processing program crashes while in use the incomplete text file can often be found in one of the temporary file folders. If in the past you've written a paper in Microsoft Word and had it close somehow before saving you may have had to find the temporary file to recover your progress.
How you get to these temporary files will depend on which ones you need to access:
As there are many different types of temporary files, there are several places where temporary files are stored. The two main areas are in the Windows folder and in your user folder:
The simplest way to access the user temp folder is through Windows search:
- Open Windows Search by clicking on it or with the Win + S shortcut, then enter "%temp%" into the search box and then click on its entry when it comes up.
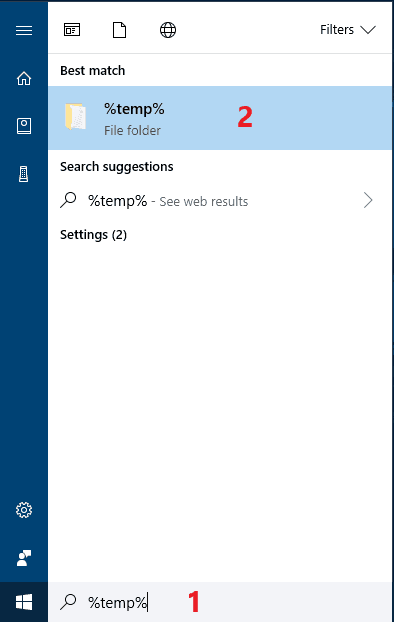
You should now be in the "C:\Users\*Your User Name*\AppData\Local\Temp" folder.
If for some reason this doesn't work, you can also go to it manually from File Explorer:
Before you can do this, you'll need to enable the showing of hidden folders. Here's how:
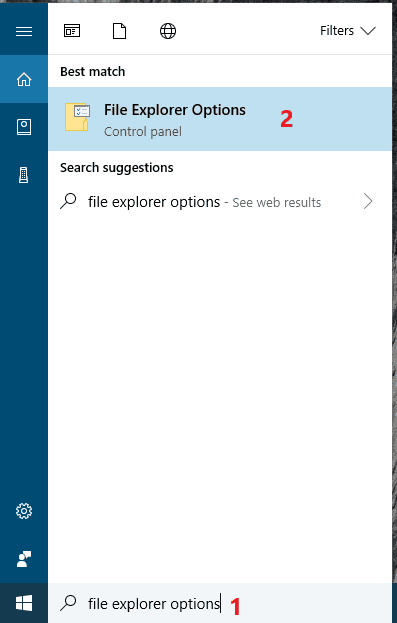
- Open Windows Search by clicking on it or using theWin + S shortcut, begin typing "File Explorer Options" and click on the entry named as such when it comes up.
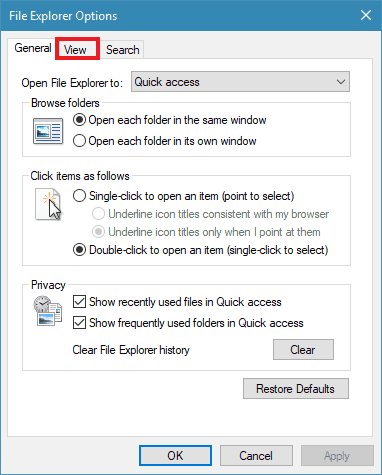
- Click on the View tab at the top of the File Explorer Options window.
- Find the Hidden files and folders entry and click on the bubble next to Show hidden files, folders and drives under it.
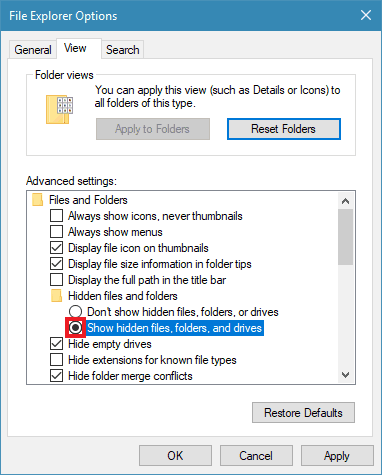
- Click on OK once you're done.
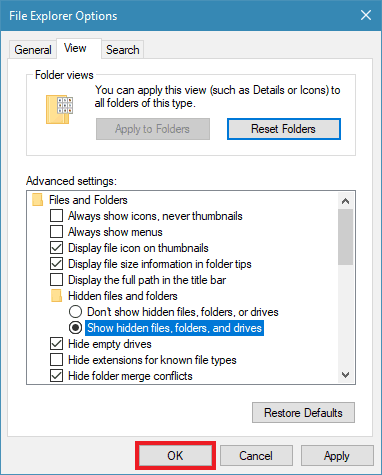
Now that you've made hidden folders visible, you can go to the Temp folder in your user folder:
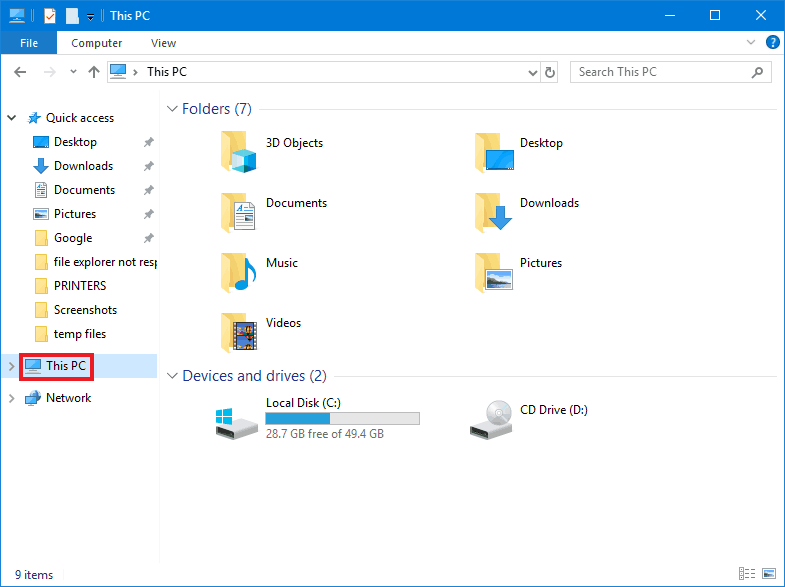
- Open File Explorer by clicking on its icon or with the Win + E shortcut. Go to This PC if not not already on it
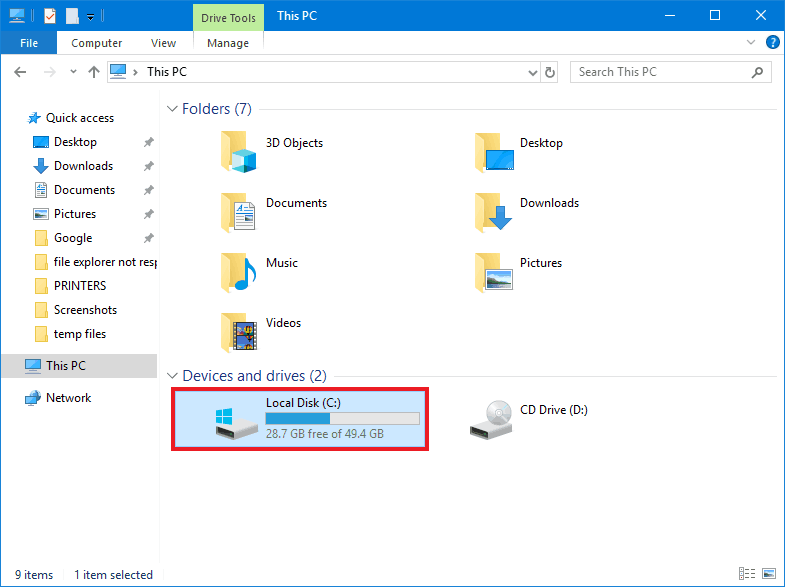
- Nowdouble-click on your Windows hard drive, usually (C:), to open it.
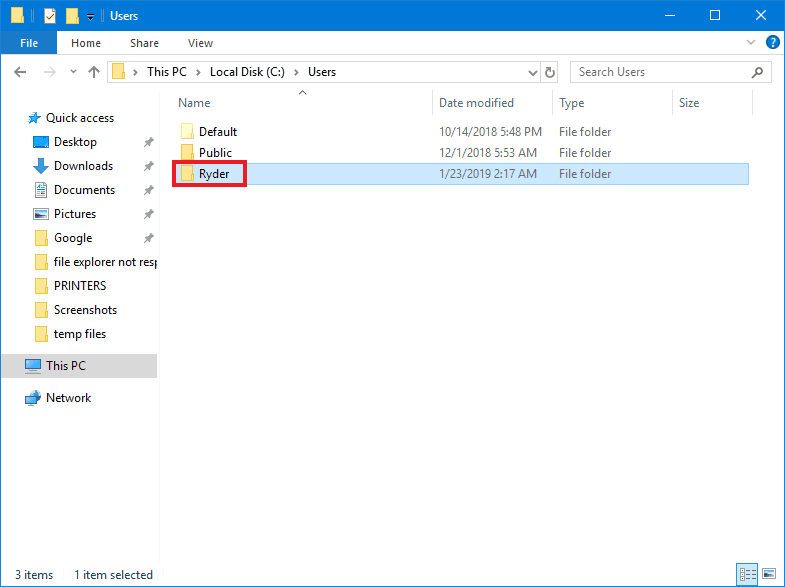
- Find and open the Users folder.

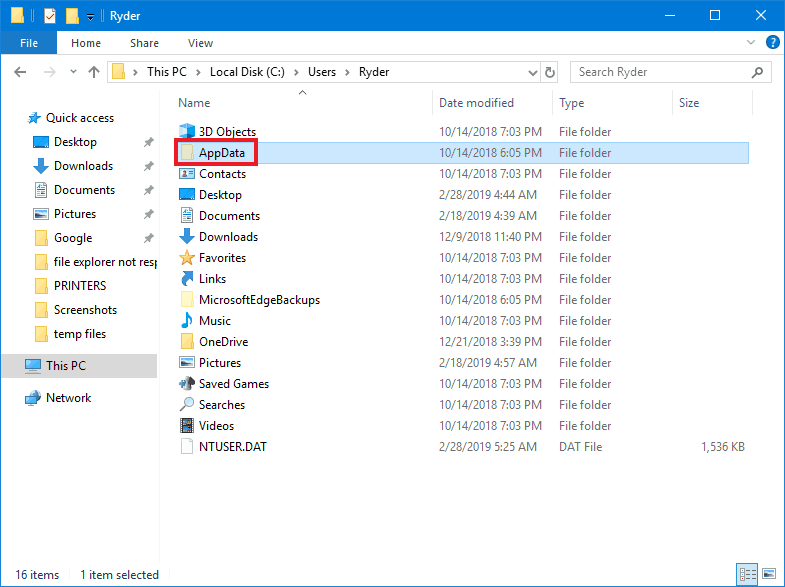
- Now open the folder with your user name. In my case it's "Ryder".
- Look for a faded/transparent folder named AppData and open it.
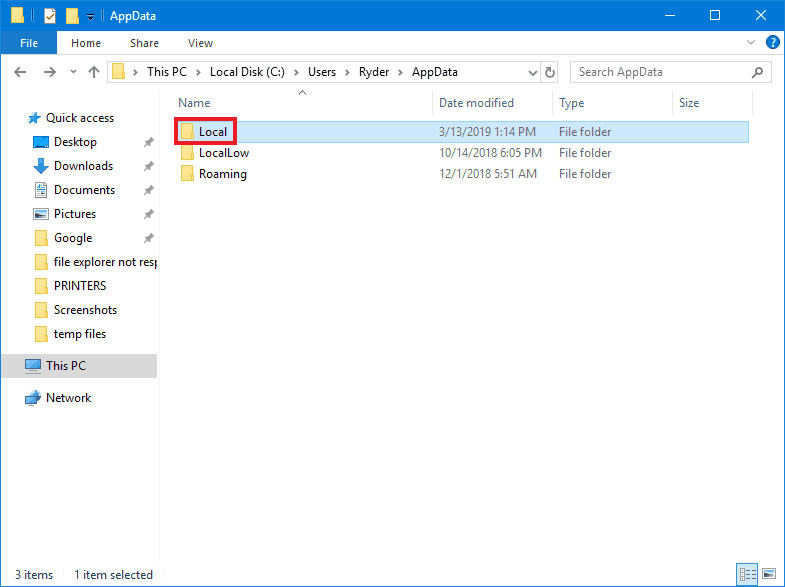
- Now open the Local folder.
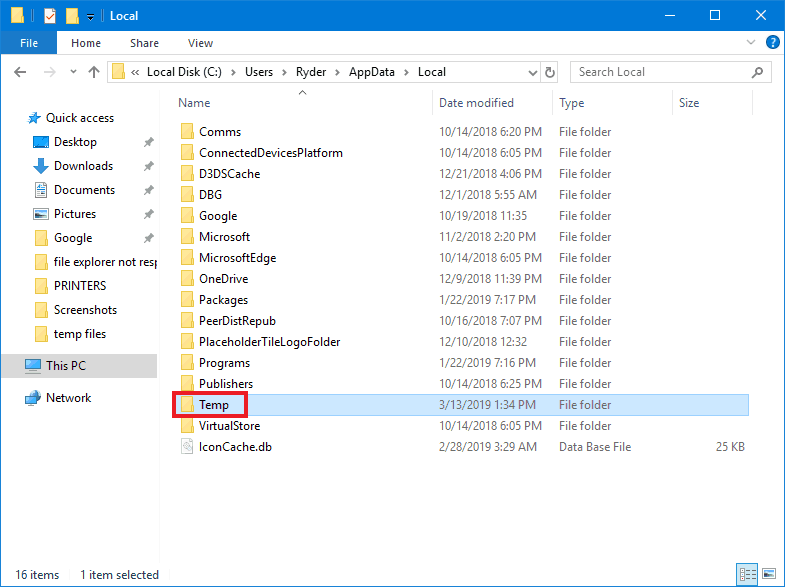
- From here you can find and open the Temp folder.
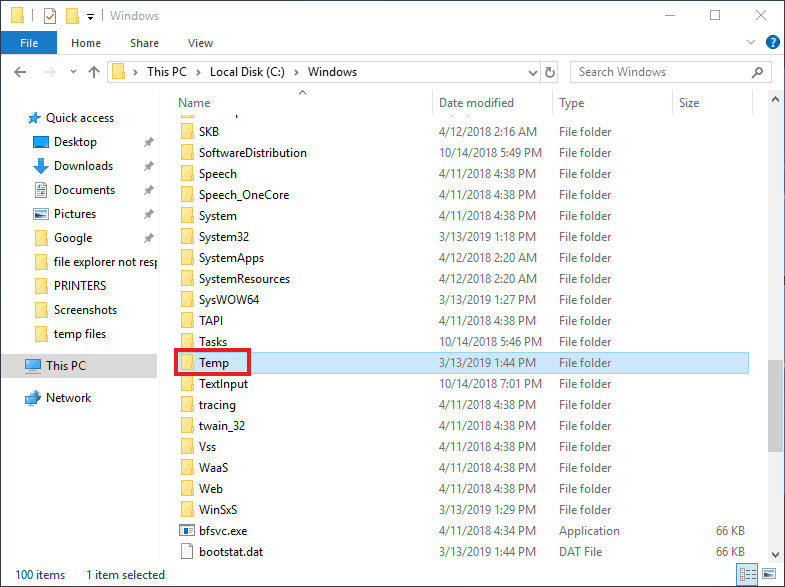
Getting to the Temp folder inside the Windows folder is a similar process:
- Open File Explorer by clicking on its icon or with the Win + E shortcut. Go to This PC if you're not already on it.

- Nowdouble-click on your Windows hard drive, usually (C:), to open it.

- Find the Windows folder and open it.
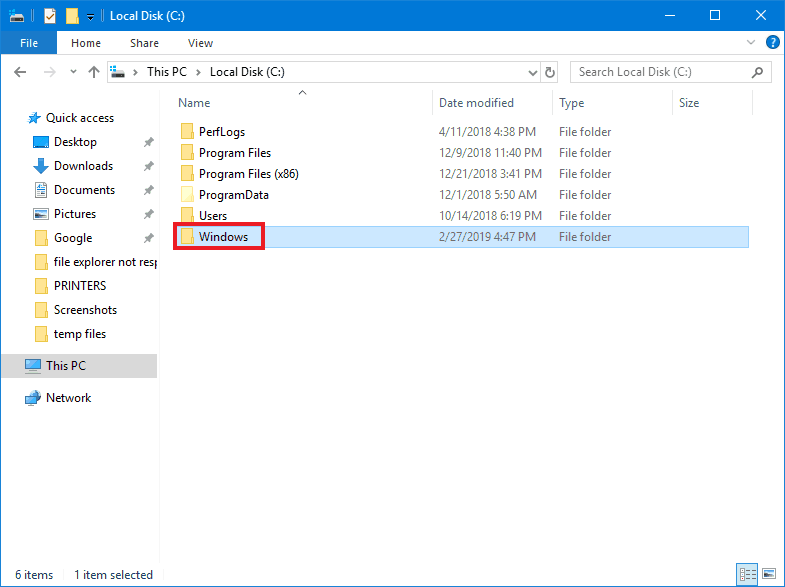
- Now scroll down and find Temp folder and open it.
Most of the temporary files you would need to access will be in one of the main Temp folders, but some programs use their own folders:
For example, if you're using the Microsoft Edge browser to download an executable file and click "Run" instead of "Save", it will end up in a temporary folder instead of your usual Downloads folder. If you end up needing to run this file again, you won't be able to find it easily. Temporary downloads for Edge end up in "C:\Users\*Your User Name*\AppData\Local\Packages\Microsoft.MicrosoftEdge_8wekyb3d8bbwe\TempState\Downloads".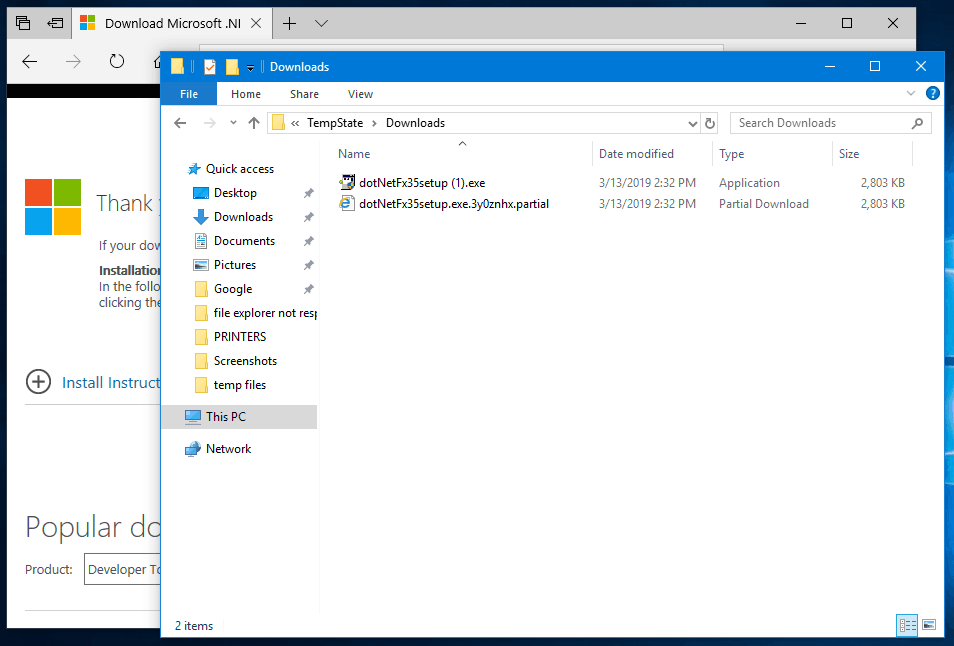
So if you aren't able to find the files you're looking for in either of the Temp folders, you'll likely need to consult a guide of some kind. If you're looking for a particular program's temporary files, you may want to check its documentation or contact support. Online guides of all kinds for accessing specific files are also pretty easy to find with an internet search. Just use your preferred search engine and enter "find *program name* temporary files".
If you just want to get rid of temporary files you don't need anymore, using a cleanup tool is the best way:
One of the easiest ways to clear up disk space is to use the built in Disk Cleanup tool. It can delete system files that are no longer needed.
Here's how to access and use it:
- Open File Explorer by clicking on its icon or with the Win + E shortcut. Go to This PC if you're not already on it.

- Nowright-click on your Windows hard drive, usually (C:), then click on Properties.
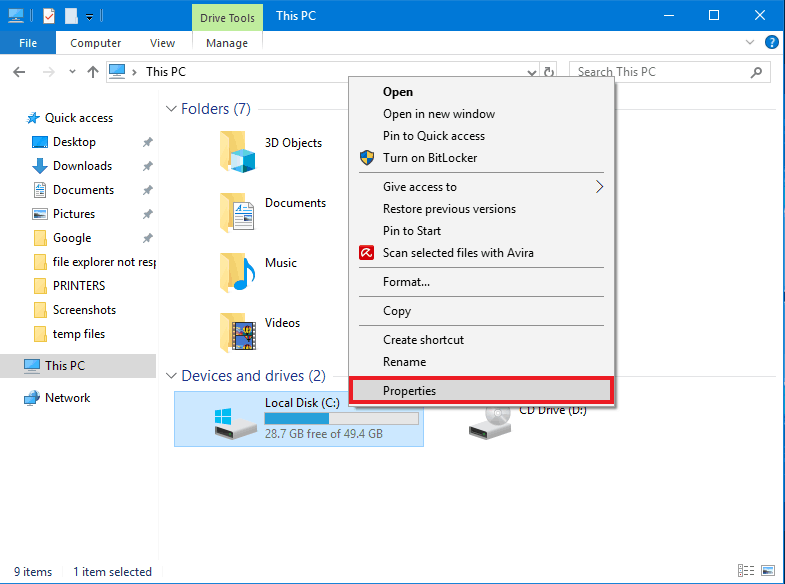
- Once in the Properties window, click on Disk Cleanup.

- Click on Clean up system files button to be able to remove more types of files.
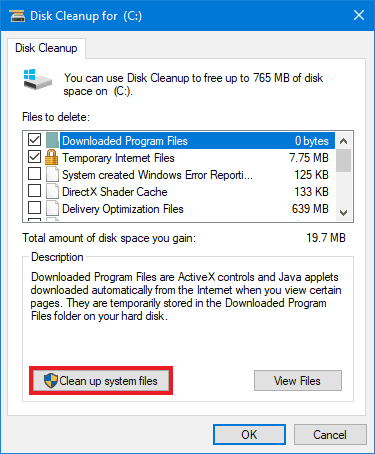
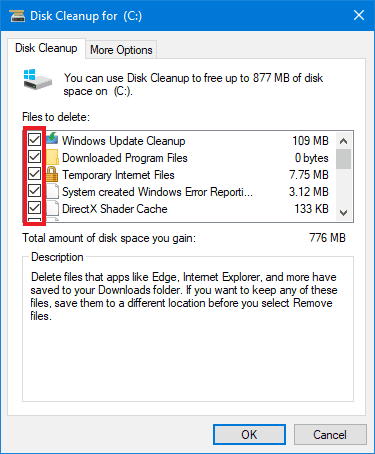
- Click the check boxes next to everything that you want to delete in the Disk Cleanup window. Only check the box next to Downloads if you don't need any of the files in your Downloads folder.
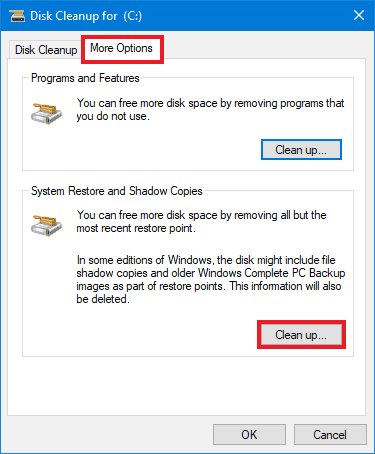
- (Optional) To free up more hard drive space, click on the More Options tab and then on Clean up… under System Restore and Shadow Copies. As the description says, it will delete all but the most recent system restore point.
- (Optional) To free up more hard drive space, click on the More Options tab and then on Clean up… under System Restore and Shadow Copies. As the description says, it will delete all but the most recent system restore point.
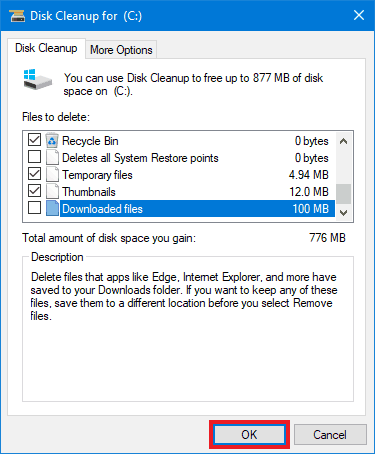
- Click on OK once you've selected all that you want to delete. The clean up may take a while to complete.
If you'd like to delete unneeded files from third party software as well, a program like CCleaner is very helpful. You can download the free version and use the Quick Clean feature to have CCleaner automatically decide what to remove, or go through the options in Custom Clean to choose what to keep and get rid of.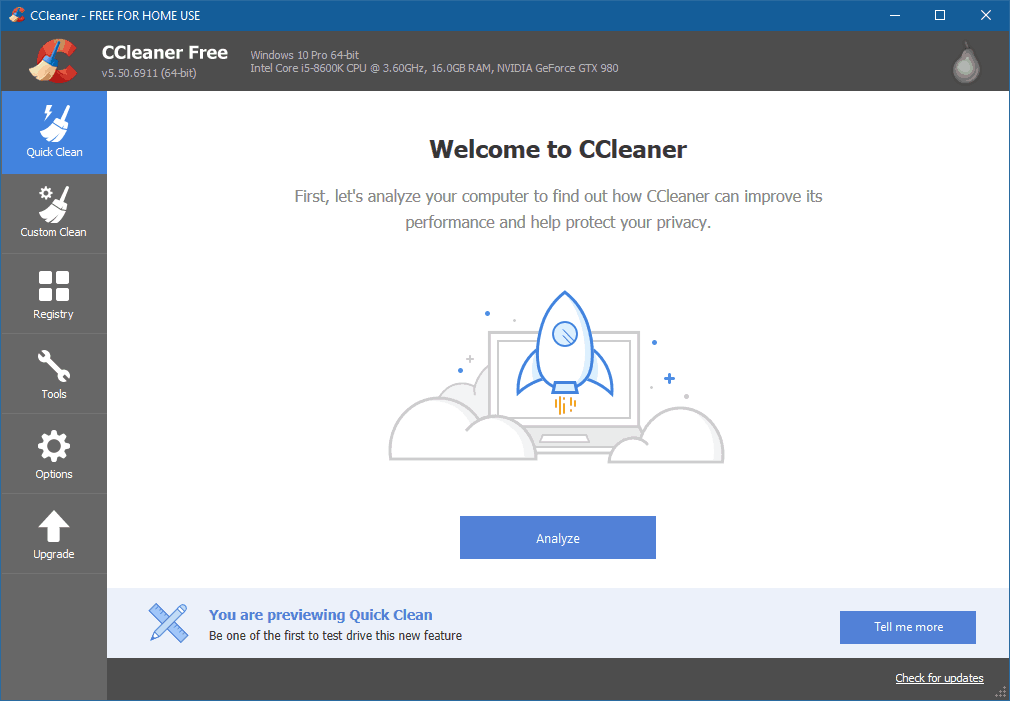
Hopefully this guide has helped you understand temporary files and manage them as you wish. If you have any questions of comments, feel free to leave them below.
How to See Temporary Files in Windows 10
Source: https://win10faq.com/how-to-access-temporary-files-in-windows-10/